
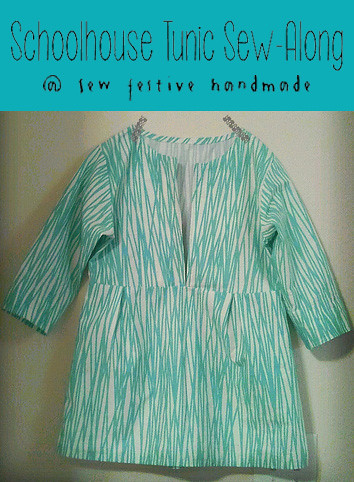
Woo! We're at our 3rd installment in the Sew Liberated Schoolhouse Tunic Sew-Along. Things really start to pick up this week. Plus, if you'll remember, all the hard sewing was last week!
So this week we should have a completed bodice [minus finishing the ends of the sleeves] on our table. The only pieces that we should be left with are the Skirt Front and Skirt Back. Put the bodice to the side for a bit as we will first be working with the skirt pattern pieces.

The first step today is to make the pleats in both skirt pieces. Take the skirt front and place pins in the markings you made from the pattern pieces. This will help you know where the marks are from the right side of the fabric.
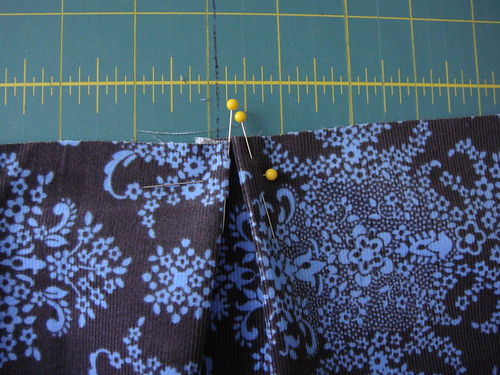

Fold the left and right pin in toward the center pin and sew 1/4" in just to hold the pleat in place. Then iron the pleat for that extra crisp.
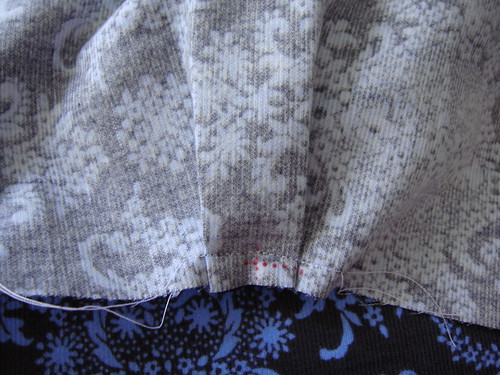
The box pleat looks like this from the back.

Repeat for the other side of the front skirt piece. You know have two box pleats.

The single pleat on the back skirt piece is created and sewed the same way.
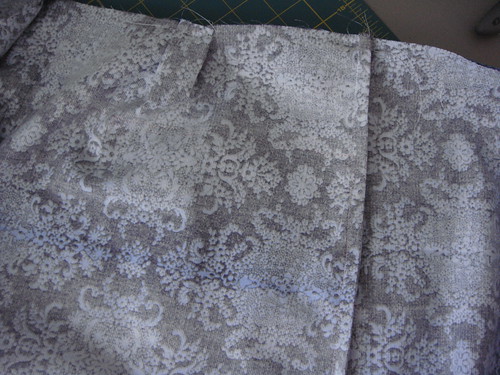
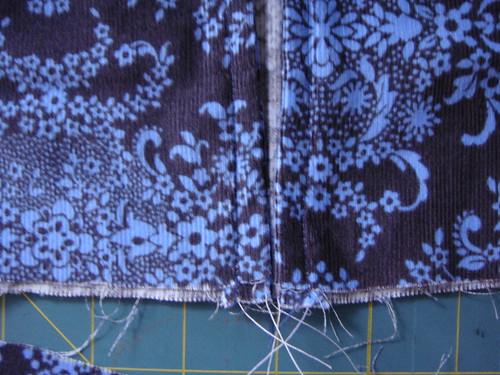
Now that the pleats are all taken care of we can sew the skirt front and back pieces together. This seam would be a great seam to try out a French seam if you haven't done so before by following the same instructions as listed last week. You can of course still sew the seam right sides together and then zigzag stitch or pink the edges. Or use a serger if you're fancy :)
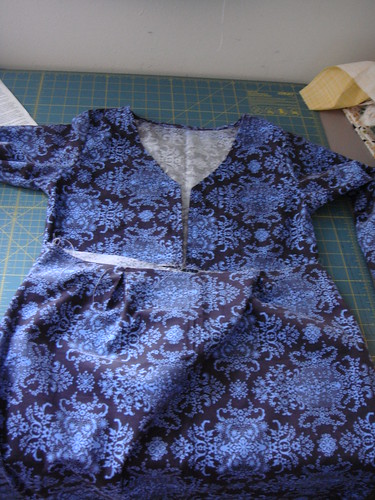
At this point you have a completed bodice and a completed skirt. Now we get to combine them!
The pattern instructs you to turn the bodice inside out and leave the skirt right side out to sew them together. These are the instructions you should follow if you are finishing your seams with pinking shears, zigzag stitch, or a serger. If you are finishing your tunic with French seams, follow the instructions below.

You're going to switch up Meg's instructions for a French seam and put the skirt wrong side out inside of the bodice, which you leave right side facing out. [FYI, this is what it looks like if you follow the pattern instructions, but the bodice will be inside out and the skirt will be right side out. But they'll be in this position still.]
You want the bottom of your placket to touch like shown above.

Pin the side seams together, with the seam pressed toward the back skirt piece. I don't normally pin when I sew, but I recommend actually pinning your skirt piece all the way around to the bodice to make sure that they fit together with the placket touching. If it overlaps a little bit that's ok, but if it doesn't meet at all then that's a problem. That's actually what happened with my tunic, and it just means that your skirt is bigger around than the bodice. To fix it I simply made my pleats a little bit bigger by moving the 2 outer pins out by about 1/4" and then doing the same on the back pleat.

Once you've sewed that seam then you will turn the whole clothing item inside out, press the seam line flat, and then stitch again for the French seam.
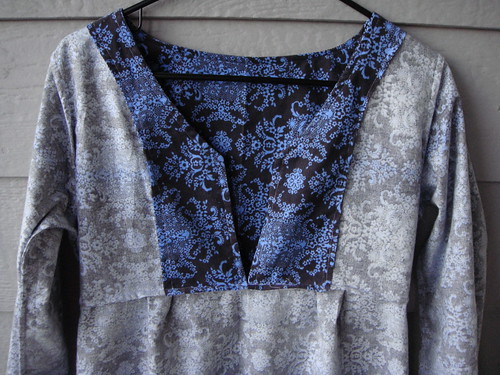
Now sit back and admire your work! Eee! Try it on! Celebrate!

Are you a little horrified upon sewing your skirt and bodice together and feeling a little concerned at how large it seems? Well hey, check out the mu-mu that I ended up sewing. It is a little disconcerting at first, especially if you're using to wearing really fitted clothes, but remember that this shirt/tunic/dress doesn't have any closures on it, and therefore has to be loose enough to be pulled over your head. So try it on before you freak out.

See, not too terrible. It is a smidge looser than I anticipated, but I am planning for this to be a winter dress, so I'm mulling over whether I want to leave room for long sleeves underneath or something like that. Observant readers will notice that my dress is actually much longer and with long sleeves. After seeing the fabric pattern on myself and realizing that I looked like I was wearing a nightgown I pinned up the hem and the sleeves to be more of a mini dress to be worn with tights. I'm embracing a 60's vibe.
Also, my boyfriend received strict instructions that he needs to improve drastically in his photography, or at least be able to take a photo in focus, or else he will be replaced for a boy who can hold a camera steady ;)
No comments:
Post a Comment
Messages from friends :)